
Table of Contents
Introduction
This article covers a deck I built to reach Infinite within 72 hours of the start of the Savage Land season. Before delving into how to pilot the deck I wanted to explain the process of the deck coming together and how my views of the game influenced this. My background in card games is limited to competing in Yu-Gi-Oh Duel Links, which is very different to Marvel Snap, but the skill to analyze what makes a deck good is transferable.
I started the season playing a sub-optimal version of a Negative Surfer list. As a season pass only player, who started playing with the mobile launch, I’m still missing 15-20 Series 3 cards, all but 3 of Series 4 and all of Series 5. I found that I was struggling to climb ranks with the Negative Surfer deck without a couple of the key cards (especially Brood). This is a feeling which I assume many people will be familiar with as some card replacements are never able to emulate the full strength of the top decks. I decided I had to change decks completely if I was going to climb ranks more consistently.
One of the key aspects to Marvel Snap is the cube system. In order to climb ranks, it isn’t enough to just have a really strong deck with a positive win rate, you need to be able to win big cube games. There are a couple of ways that this can be done. The first is to have huge combo plays which your opponent can’t fully predict the power or location of to swing the game on turn 6. The second is to disrupt your opponent and remove power from their turn 6 combos. If you look at the current Tier 1/2 decks then you’ll recognise one or both of these abilities in each of them. I believe that the best decks to gain cubes will be able to do both and Baero is a great example of this.
The secondary impact of a turn 5 Wave play is often massively overlooked. While everyone focuses on how Wave allows the use of multiple cards with cost reduction, providing big combos with Death and She-Hulk, the aspect of Wave limiting your opponent is just as pivotal. It is this concept which I wanted to base my Zabu decklist around.
Deck Building Process
Zabu synergises with Wave due to the cost reduction keeping your 4 cost cards at 2 cost. This might seem counter-intuitive initially because that is the same as not playing Wave but it’s the aforementioned aspect of limiting your opponent by playing Wave on turn 5 which is key. With Zabu in play, a turn 5 Wave allows you to play three 4 cost cards while your opponent can only play one card if they don’t have cost reduction abilities. This severely limits the capabilities of decks which like to explode on turn 6 (e.g. Negative Surfer) and can facilitate large power swings on turn 6.
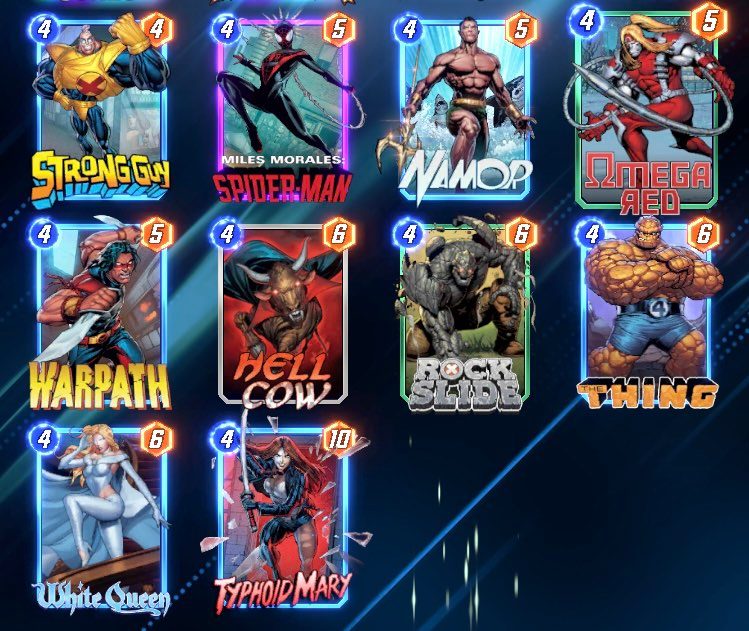
With that idea in mind, I had to look at my 4 cost cards to work out the best cards at my disposal. As you can see in the images below, I don’t have access to many of the strongest 4 cost cards like Spider-Man, Absorbing Man, Shuri or Darkhawk. However, Enchantress and Shang-Chi are two extremely impactful cards which all users in Series 3 own and they were immediate inclusions for me. I determined that I didn’t want to use Rescue or Jessica Jones because their abilities took a turn to activate and that wouldn’t synergise with a big turn 6 push. My next most powerful option was Drax and I added Rockslide as a strong base power card with the flexibility to be played early for disruption.

Another Wave combo which I had seen previously was how it interacts with Goose. All cards which have been set to 4 cost by Wave can’t be played on a Goose location. That deck used a turn 5 Wave, carrying two energy, into a turn 6 She-Hulk which could add 10 power to the Goose location uncontested by the opponent. Zabu also allows your reduced 4 cost cards to be played into Goose so this combo had natural synergy and Goose and She-Hulk were added to the deck.
However, the deck was still missing a bit of a power push. Luckily, there is another card which synergises perfectly to connect the Zabu and She-Hulk gameplans – Moon Girl. Moon Girl was pivotal for this deck as it allowed combos to be extended and resources replenished. It also added flexibility to the deck as a key line of play quickly developed as an alternative to turn 5 Wave:
- Turn 4 – Moon Girl to duplicate She-Hulk
- Turn 5 – Skip
- Turn 6 – Play two 1 cost She-Hulk and a 4 cost card (two 4 cost cards if Zabu had been played on turn 3)
This gave the deck, which was lacking power, an explosive turn 6 which could play 36 power with the biggest high rolls of double She-Hulk and Drax. Alternatively, the deck was able to push out the 20 power of double She-Hulk with the disruption of Enchantress and/or Shang-Chi to swing multiple locations in one turn. All that was left was to fill out the deck’s early curve.
I originally defaulted to Iceman, Scorpion and Lizard to provide this as I wanted to lean into more disruption. However, as I started playing with the deck I quickly realized I was often leaving spare energy, especially on turn 5. I mentioned previously that skipping turn 5 reduces She-Hulk to 1 cost on turn 6. While the incentive to do this when you have duplicated She-Hulk in hand is clear, it’s actually better to do this almost every time you don’t have a turn 5 Wave or early Zabu because the deck runs no other 6 cost cards. A turn 5 skip into She-Hulk and a 4 cost is the same power as playing a 4 cost on turn 5 and She-Hulk on turn 6 but the latter gives up information and the ability to counter more effectively with Shang-Chi or Enchantress. Therefore, the standard Sunspot package with Armor was the logical final inclusion for the deck.
 Whybona


Overall Strategy
The general game plan is very similar to Sera Control lists as you usually prefer to let your opponent have priority on turn 6. This allows Shang-Chi and Enchantress to have the biggest impact and allows you to win more cubes. This is enhanced by the surprise power of She-Hulk and protects your own power push from opposing counter cards.
Therefore, in the early game you should try to focus your tempo cards on just one location to allow your opponent to win the other two. Sunspot and Lizard can be played on the same location to avoid spreading power while cards like Goose and Zabu can be played on another location as their power is usually too low to be winning by turn 6.
Another aspect of the deck’s core strategy is to set up a turn 6 where you can play multiple cards on multiple locations but your opponent is limited. Turns 4 and 5 are the most important for this set up and I will go into more detail about how this can be achieved on a turn by turn basis. It is important to be flexible with this deck since you are often seeking to be reactive so use this information just as a guideline and not a must complete.
Turn Guide
Turn 1
Play Sunspot. If I have Armor in hand then I like to play Sunspot on the far right location as I will be able to keep it safe from the majority of negative locations while gaining access to locations which the deck might otherwise struggle to push into. If you don’t have Armor ready for a turn 2 follow up then it’s usually best to just play safe with Sunspot in the revealed location.
Turn 2
The deck has several potential plays on turn 2 and is where you can start to react to your opponent’s plays. If you have already played Sunspot then Armor, Lizard or Goose should usually be played on the same location. This protects Sunspot from Killmonger and/or keeps your power on a single location to manage priority easier later on. Armor is the priority in this situation.
If you didn’t play turn 1 Sunspot then your options have more variety. Goose and Lizard should be played on a location which your opponent hasn’t played on. This makes Goose more effective as your opponent may have been intentionally keeping a location open for higher cost plays. It benefits Lizard as there is a smaller chance they will fill that location throughout the game.
Armor can be played for tempo or to disrupt the opponent if they have played a card like Nova. Consider holding Armor in hand for a later turn if you see a location with destruction effects. Armor is your only safe play into those and it can occasionally be used better as a turn 6 surprise to push into that location.
An extra factor to consider is the order of cards in your hand. If you’re hoping to duplicate with Moon Girl then you will want the most impactful cards on the left side. This might mean that you prioritize playing a Goose from the left side of your hand rather than a Lizard you just drew.
Turn 3
Turn 3 is very similar to turn 2. If you draw Zabu then you will want to play it on the same location as your 2 cost card. Each of those cards have an Ongoing ability which adds some potential protection from Rogue. Goose is the ideal card to accompany Zabu as it blocks your opponent from using Enchantress unless they have their own cost reduction. If you already have Sunspot and a 2 cost on a location then it is usually fine to add Zabu on turn 3 and then leave it open for the rest of the game. Sunspot will soak up enough energy to help compete for that location with just one card on turn 6 if required.
If you don’t draw Zabu then you will want to play another 2 cost card. Again, it is usually fine to play them on the same location but follow the same principles as turn 2.
Turn 4
This turn is when you should identify your line of play for the rest of the game and set yourself up accordingly. This is the best turn to play Rockslide if you drew it. It’s also the turn you would usually play Moon Girl. Your other 4 cost cards are generally better if saved for the turn 6 push but there will be scenarios you want to play one early.
Enchantress can be played on turn 4 into opposing Zabu or Wong. Drax can be played to compete for locations like Flooding or Kyln but it might be better to sacrifice that location if your opponent can push power there later.
Ideally, Moon Girl will be played to duplicate She-Hulk. This is where your previous moves were important to get She-Hulk to the left side of your hand. If you played Zabu on turn 3 you can play Moon Girl with another card to manipulate your hand order on this turn. If it’s not possible to duplicate She-Hulk then you might still want to duplicate your other 4 cost cards. However, be careful with maxing your hand out to 7 cards if you’re hoping to draw into a specific resource.
If you draw Zabu on turn 4 then it might be too late to play it. You must evaluate what cards you will be able to play on turn 6 with and without it. For example, if you’re able to duplicate She-Hulk then playing turn 4 Moon Girl, into a turn 5 skip, will give you double She-Hulk plus a 4 cost card on turn 6. Playing Zabu would allow you to Wave or skip on turn 5 into two 4 Cost cards and She-Hulk on turn 6. It is up to you to be flexible and work out the best line, you might need the power from double She-Hulk or the disruption of Wave, Enchantress and/or Shang-Chi.
You should aim to play your card(s) on locations which you won’t be winning or expect the opponent to outpower to give your opponent priority on turn 6.
Turn 5
Turn 5 is usually one of just two options for this deck, play Wave or skip. When playing Wave you will want to carry the spare energy so that She-Hulk will be a 2 cost on turn 6. This sets you up to play multiple cards even if you didn’t play Zabu. The important part of this line of play is how much it impacts your opponent.
Sometimes you will have double She-Hulk in hand and a Zabu on the board so skipping turn 5 allows you to play four cards in total while playing Wave would only be three cards. However, playing Wave to limit your opponent could be more important if they are a combo centric deck.
If there are cost reductions affecting your opponent, whether location or card based, a turn 5 Wave might be better to avoid. For example, Titan would reduce 6 cost cards to 3 cost after Wave. An opposing Zabu would allow the opponent to play a 5 or 6 cost with a reduced 4 cost, a combo not possible without Wave.
However, the most common cost reduction is currently Sera in Surfer decks so Wave is a good play here to limit them to just two cards rather than the three (or more in Sera Negative) they would plan to play.
If you don’t have Wave then you will skip turn 5 almost every game. As mentioned in my deck building process, you can output the same power (more with Sunspot) on turn 6, after skipping turn 5, as you could if you played your cards across turn 5 and 6.
One exception to the Wave or skip rule is playing Sunspot on turn 5. If you didn’t duplicate She-Hulk you can play just Sunspot on turn 5. This will carry 4 energy so that She-Hulk is a 2 cost on turn 6 and you can still play She-Hulk and a 4 cost card.
Turn 6
You should have a multitude of options on this turn and this is where you can swing the game by reacting to your opponent’s plays. Your plays will also vary depending on how you set up for the turn and the cost reduction on your cards. I will provide some examples of your turn 6 combos based on different turn 4 and 5 setups:
- Turn 4 Moon Girl -> Turn 5 skip -> Turn 6 She-Hulk (x2) + 4 cost (x2 with Zabu)
- Turn 4 Moon Girl -> Turn 5 Wave -> Turn 6 She-Hulk (x2) + 4 cost (with Zabu)
- Turn 4 Moon Girl -> Turn 5 Wave -> Turn 6 She-Hulk + 4 cost (x2 with Zabu)
- Turn 5 skip -> Turn 6 She-Hulk + 4 cost (x2 with Zabu)
- Turn 5 Wave -> Turn 6 She-Hulk + 4 cost (x2 with Zabu)
- Turn 5 Wave -> Turn 6 4 cost (x3 with Zabu)
As you can see, there are a range of different combos you can play and Zabu isn’t essential to them, it only extends them.
Turn 6 Tricks
- Save energy to get surprise Sunspot power
- Cost reduced cards played into Goose location (opponent usually can’t play here after Wave)
- Enchantress on Lizard if their location is full
- Enchantress on Washington D.C. to turn your Ongoing cards into No Ability cards
- Enchantress on Armor into Shang-Chi
- Enchantress on Blue Marvel vs Cerebro 2 – all Cerebro boosts go to Blue Marvel
- Shang-Chi + She-Hulk in same location vs Leader – without priority your Shang-Chi destroys the copied She-Hulk and you keep yours
- Armor on Death’s Domain, Danger Room or Vormir
- Against Aero – fill a location you’re winning (their Aero target) to guarantee your desired card is played in the correct location
Example Game Walkthroughs
Game 1
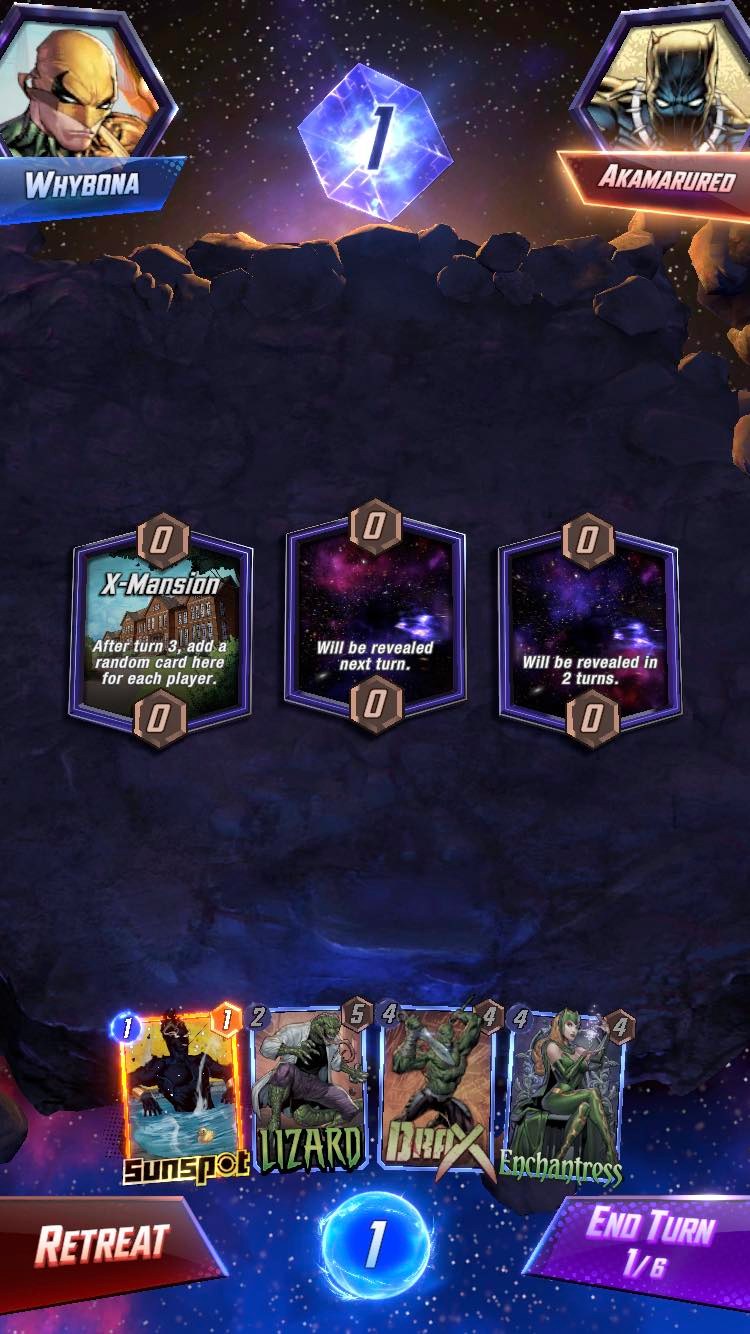
Sunspot and Lizard are great to see in the opening hand. I play Sunspot in the middle location because I want to play Sunspot and Lizard together and X-Mansion is likely to fill up.
My opponent played Ebony Maw on X-Mansion on turn 1. I stuck with my plan of stacking Sunspot and Lizard because Ebony Maw decks usually have a way to flood that location later on.
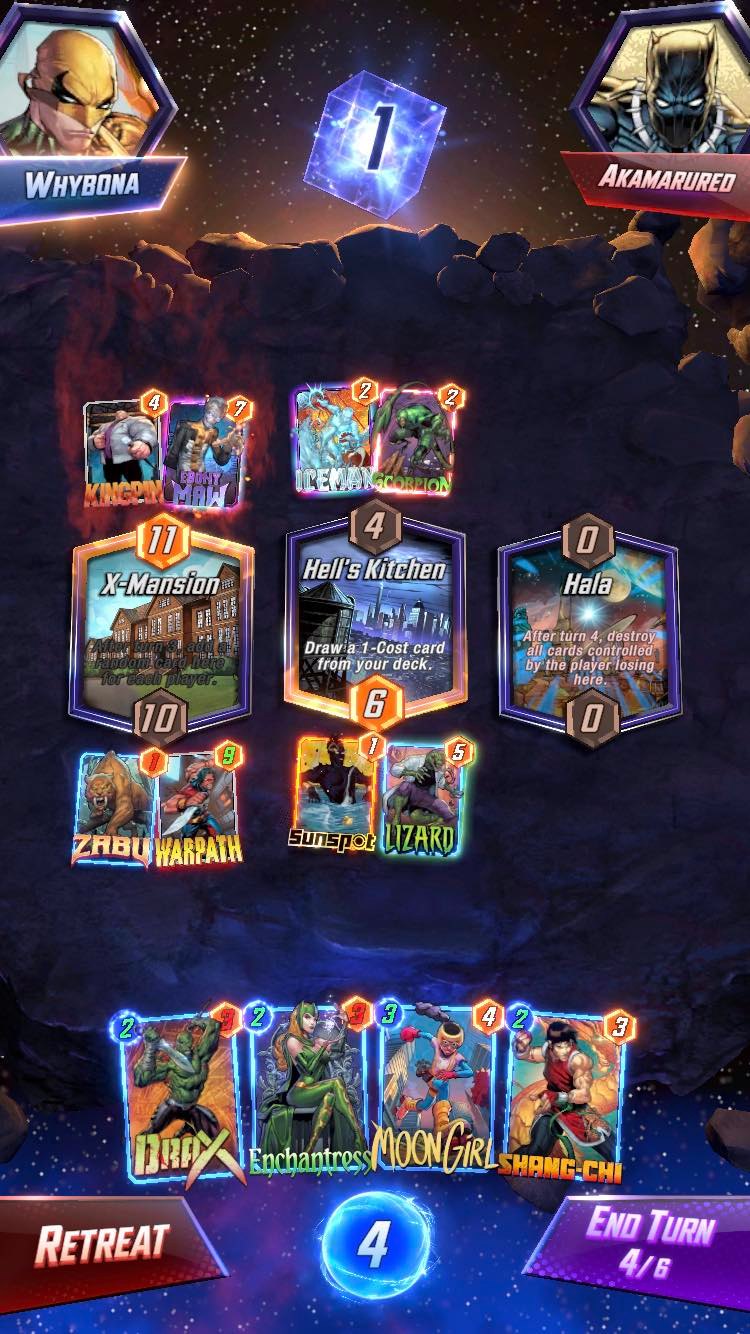
Scorpion and Lizard were played on turn 2. On turn 3, I played Zabu into X-Mansion because they wouldn’t be able to play an Enchantress or Rogue there. Thankfully, X-Mansion didn’t add anything game changing.
My hand for turn 4 was quite awkward after Moon Girl had been hit by Iceman because I’d prefer to hold on to Enchantress and Shang-Chi. With Hala being the right location and the opponent appearing to play an on reveal deck, I expected a card like Wong to be played and decided to play Drax to contest it while maintaining my counter cards for later on.
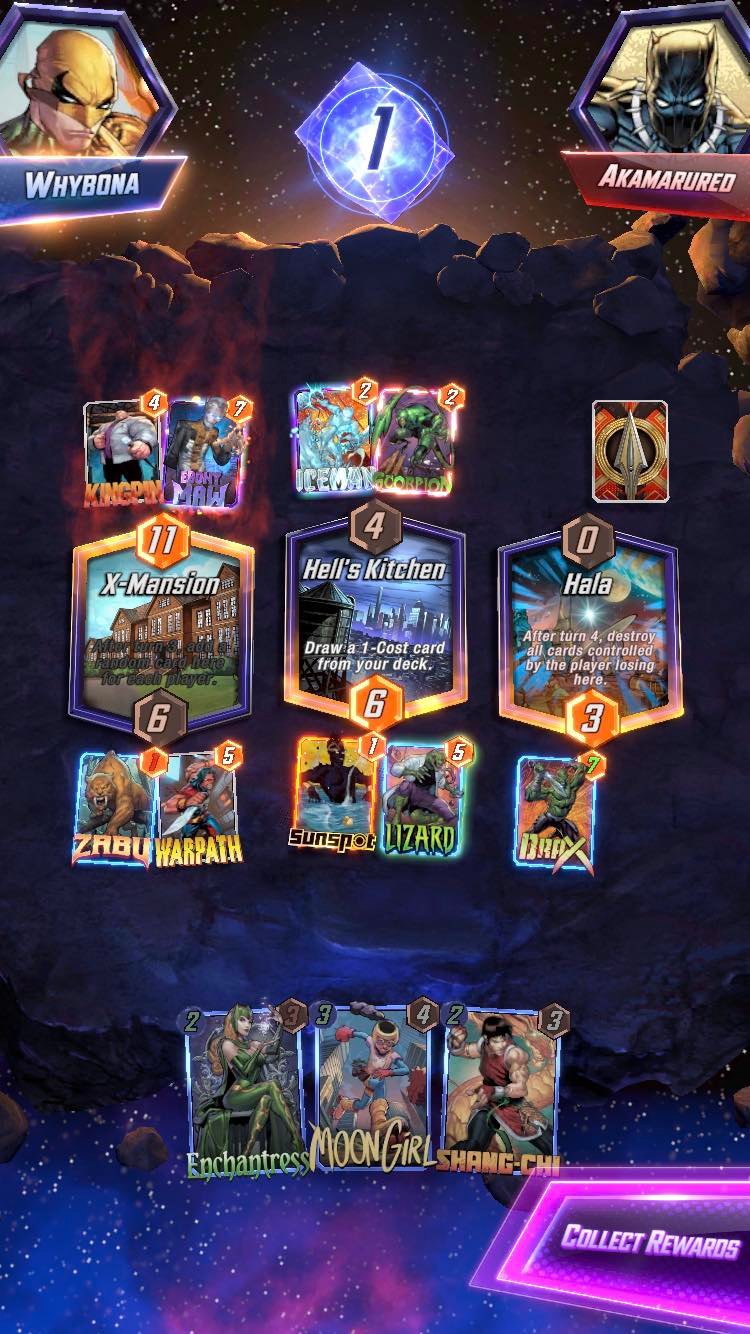
My opponent retreated before their card could even be revealed so I can only assume they were hoping to set up a Wong location. This was an early retreat but showcases the standard early game plays and thought processes.
Game 2
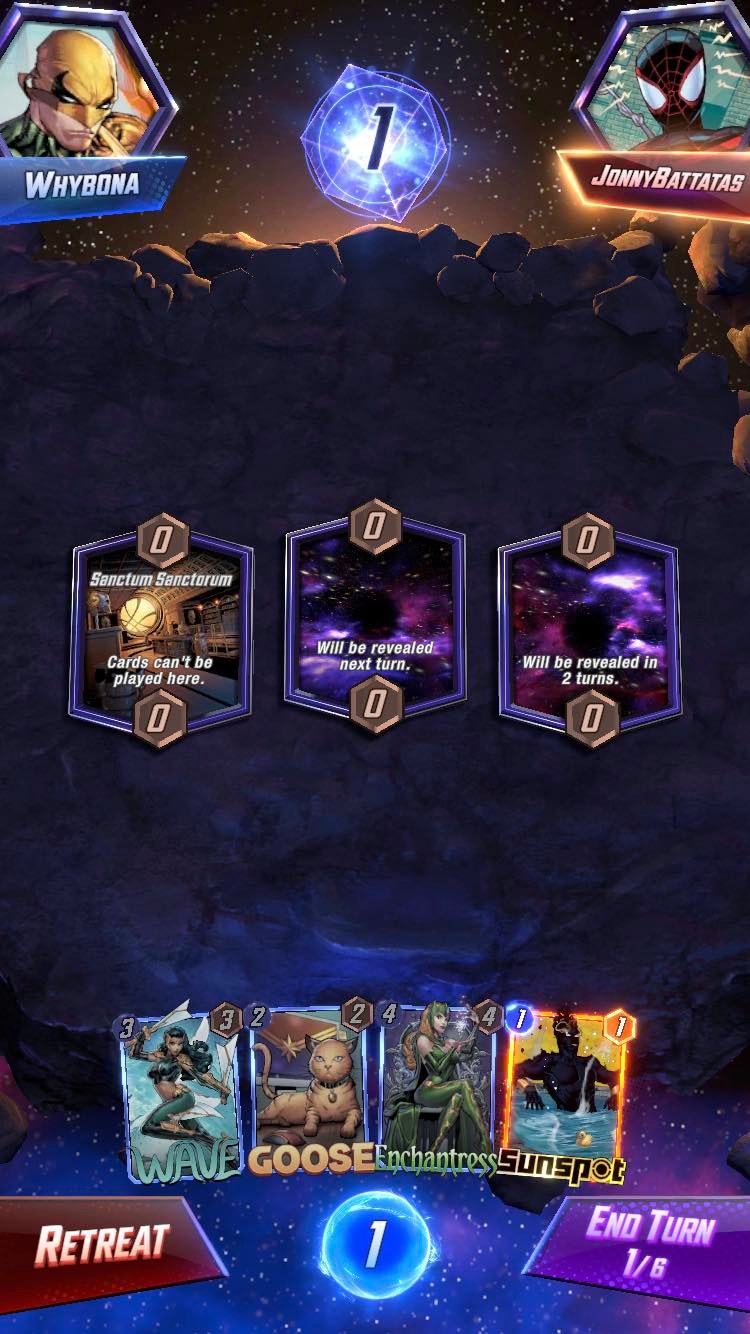
Turn 1 Sunspot again. Sanctum Sanctorum is a location I can’t access at all but with Goose I can limit their big cost plays to just one location.

On turn 2 Elysium is revealed. This is extremely helpful as it allows me to play my 4 cost cards into a Goose location without playing Zabu. It also helps Sunspot gain more energy throughout the game. I played Goose into the right location because they were yet to play there.
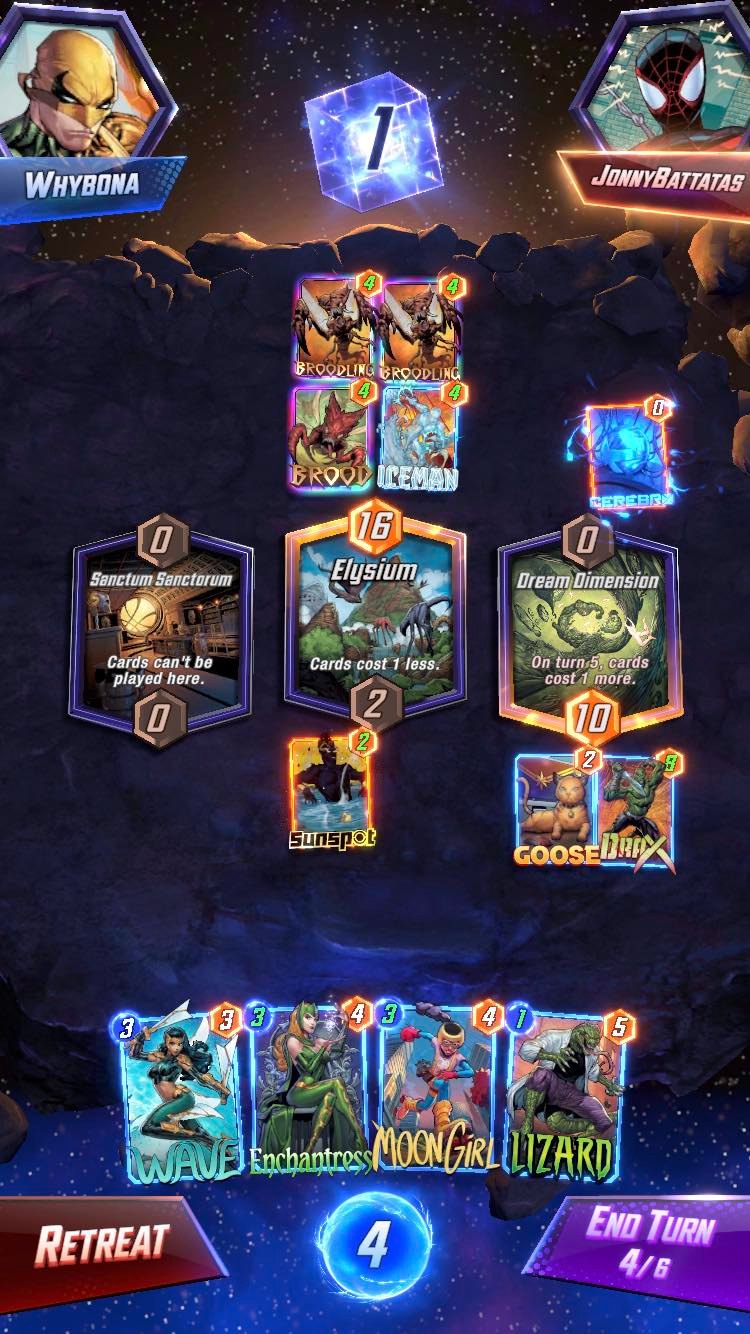
On turn 2 my opponent played Brood on Elysium, suggesting it is a Cerebro 2 deck. This was confirmed when they played Cerebro on turn 3. As the right location was the only place they could play a card, I played Drax on turn 3. There was a risk here due to potentially losing priority and being unable to stop a turn 6 Cerebro but we could skip turns to try make that happen.
In this position I didn’t want to play Enchantress immediately because I would only gain a single cube and a snap when seeing Cerebro would likely trigger the same response.
Therefore, I played Moon Girl and Lizard in the middle location on turn 4. This allowed me to duplicate Enchantress so I would be able to play one to negate my Lizard downside and one to negate the Cerebro.
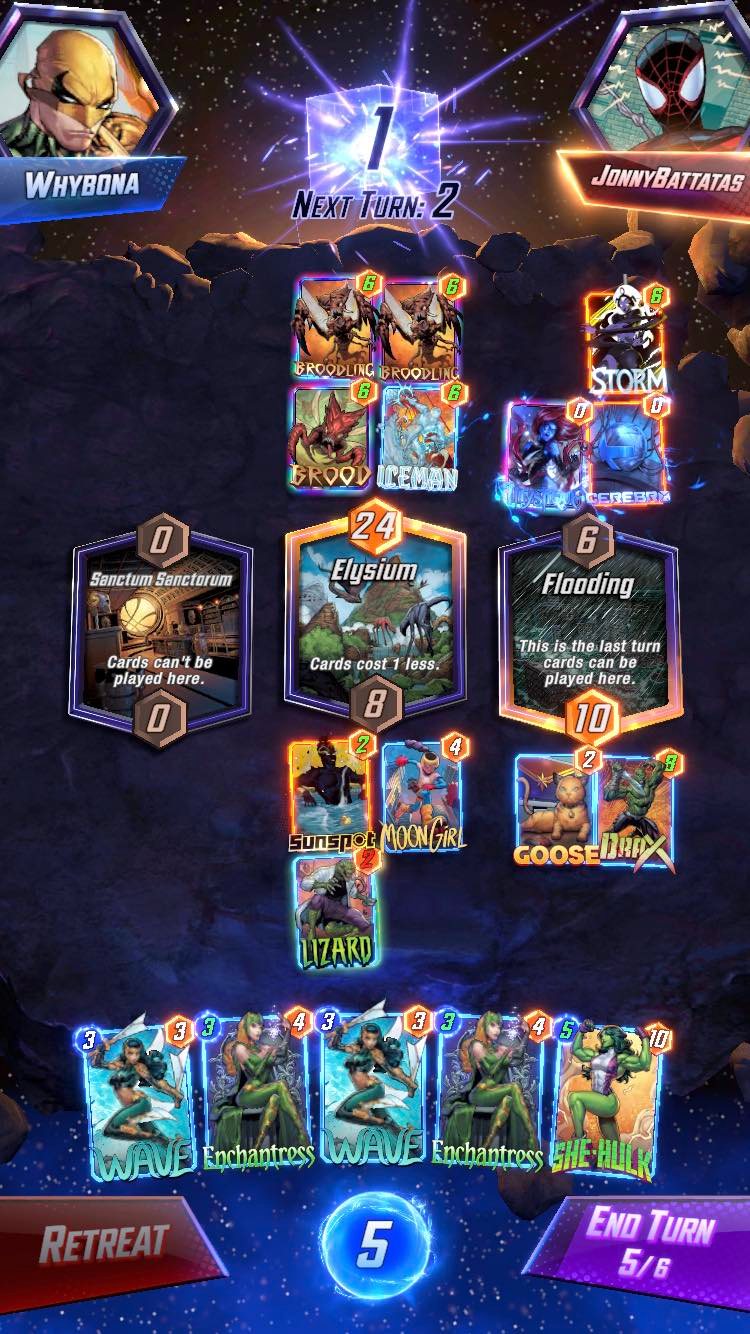
My opponent made the surprise play of Mystique followed by Storm on turn 4. This was going to lock them out of playing any cards on turn 6 and limit me to just Elysium. This was my prompt to snap.
I had to play Enchantress to negate Cerebro and Mystique on turn 5 and they would always retreat on turn 6. The snap would allow me to gain one extra cube if they stayed for the turn, the same as winning a full game on turn 6.
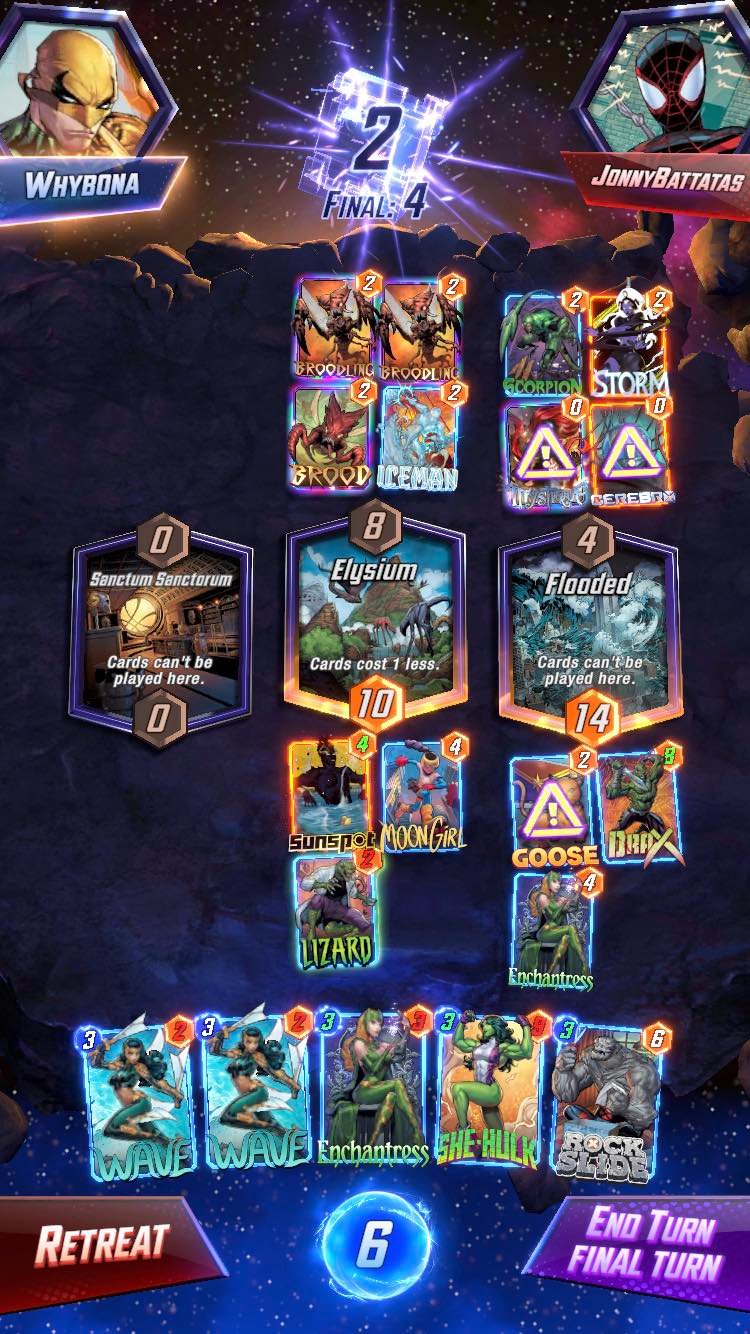
My opponent did stay in the game and filled the location with Scorpion which would have given them 12 total power there. However, Enchantress came down and forced the retreat.
I chose to include this game to highlight some strategy behind when to play your counter cards and when to snap.
Game 3
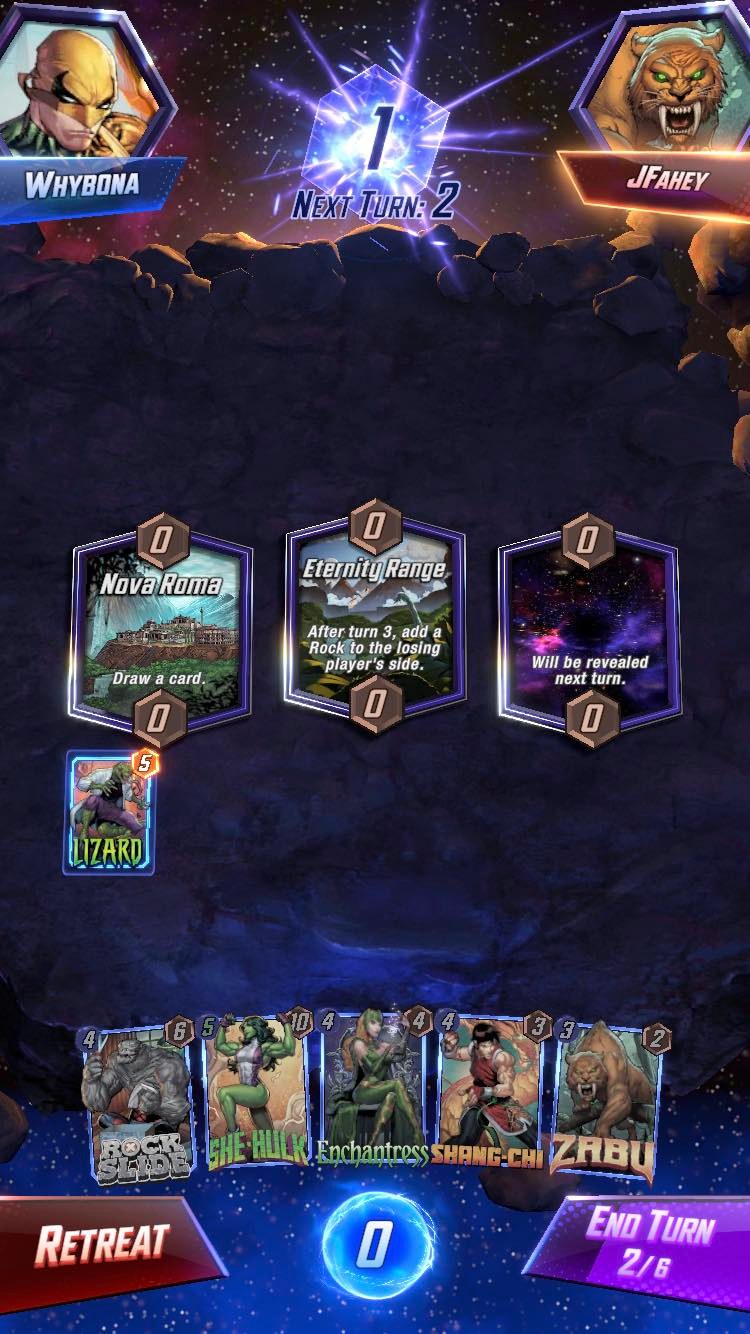
No cards were played on turn 1 of this game. My opponent snapped at the start of turn 2 and I decided to stay since I had both counter cards and Zabu in hand already. I played Lizard on Nova Roma to avoid Eternity Range, giving them a Rock would make it easier to fill the location and reduce Lizard’s power.
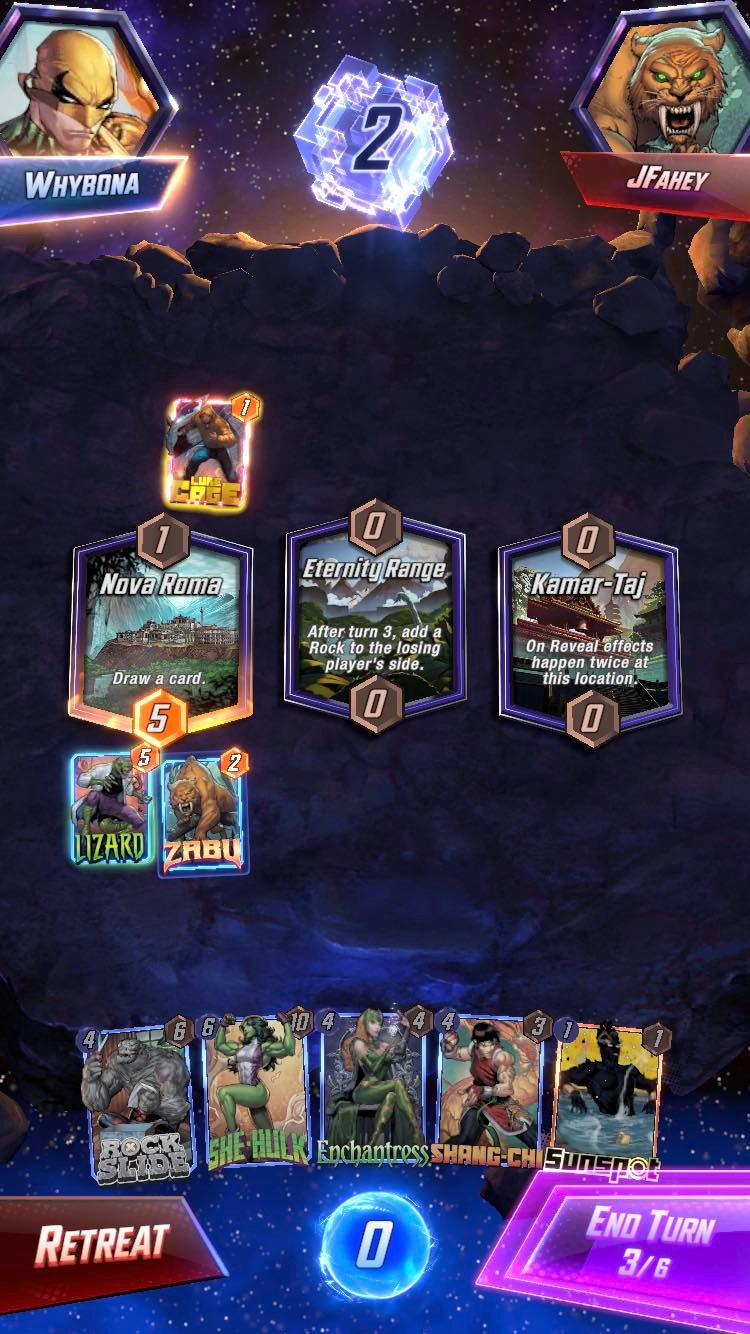
My opponent played Luke Cage on Nova Roma which suggested they were playing a Hazmat deck. I knew Luke Cage would be an important part of their strategy and using Enchantress on that location could swing me the game but I didn’t want to snap back without being fully aware of their gameplan.
I played Zabu on the same location because I wouldn’t be using Enchantress until turn 6, it provides some protection from Rogue and they wouldn’t want to use an Enchantress of their own there.
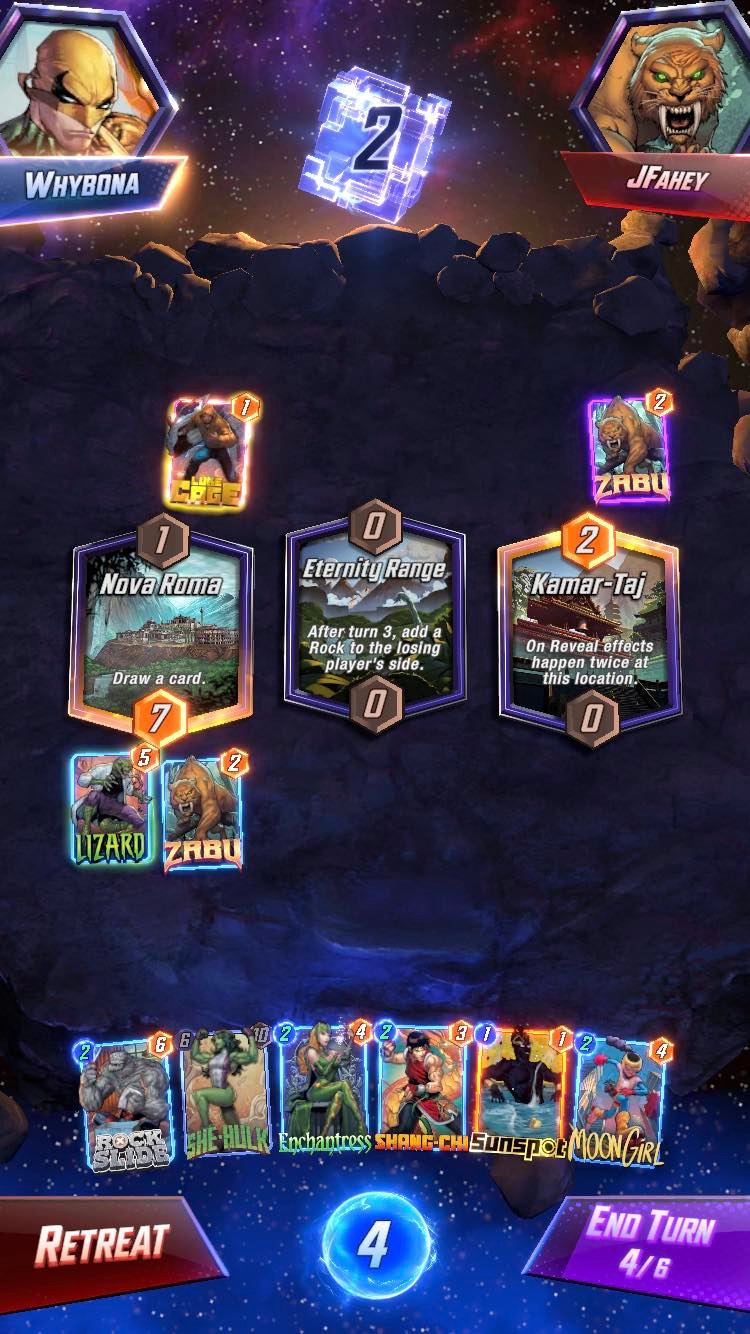
My opponent played their own Zabu on Kamar-Taj on turn 3. I could have negated that with Enchantress but I believed that negating Luke Cage would have more impact.
Instead I decided to lean into the She-Hulk duplication. I played Moon Girl on Nova Roma because I was already winning that location and I was less likely to gain priority.
I played Rockslide on Kamar-Taj for maximum disruption. Playing Rockslide also meant that my duplicated cards would be She-Hulk, Enchantress and Shang-Chi.
Funnily enough, my opponent also played the same two cards for their turn 4 play.
This turn 5 highlights one of the exceptions to the turn 5 guidelines, playing Sunspot. Sunspot gains 4 power from playing it on its own location and passing and still allows three cards to be played on turn 6. I could have passed completely to reduce both She-Hulk to 1 cost but I wanted to have some potential to play around a Spider-Man lockdown, one of Zabu’s most common combos so far.
I played Sunspot on Eternity Range since it was more likely to add power there than Kamar-Taj without gaining priority.
My opponent went for a big push on turn 5. They played Darkhawk on Eternity Range and used Absorbing Man to add two more Rocks to my deck.
I was confident I could win from this position but I didn’t snap back. If I snapped on this turn I think my opponent might have retreated and I wanted the safe four cube gain. This comes down to personal playstyle, snapping in this position could definitely be justified.
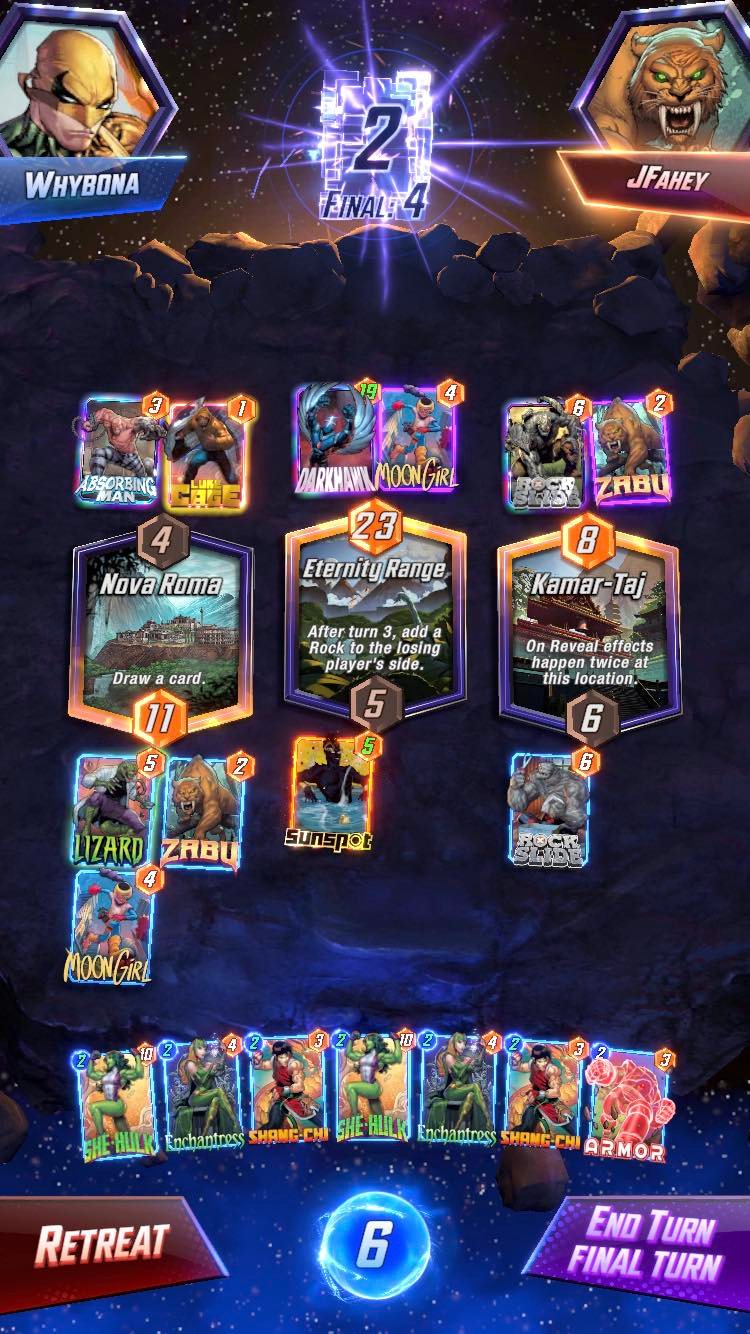
I had a card to beat each of his locations. Enchantress on Nova Roma, Enchantress or Shang-Chi (Enchantress is optimal but I played Shang-Chi in this position) on Eternity Range and She-Hulk to beat his current power in Kamar-Taj.
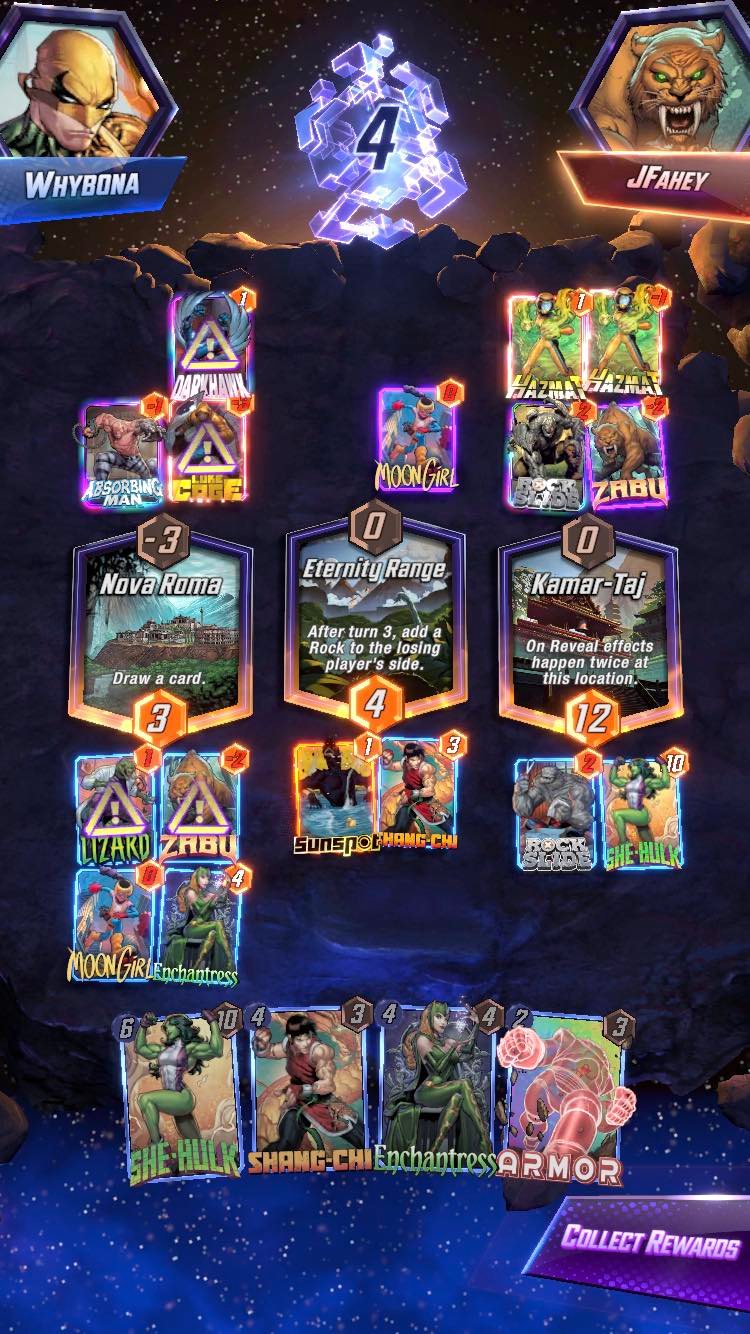
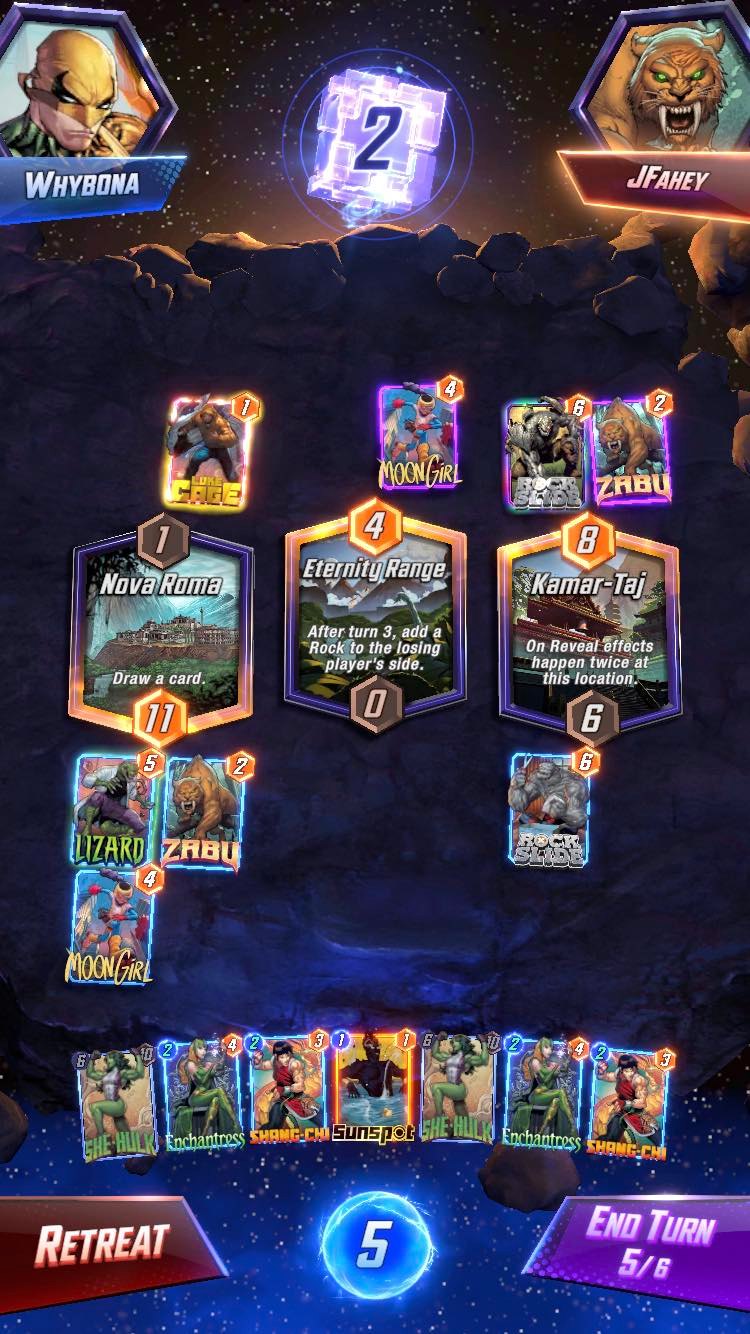
This was the final board state. My opponent had priority and played double Hazmat on Kamar-Taj followed by a second Darkhawk on Nova Roma. The Hazmat play reduced the power of all my revealed cards by four while their cards were protected by Luke Cage.
My Enchantress negated the effects of his Luke Cage, removing their protection from Hazmat and lowering the power of each of their cards by four. It also negated the Darkhawk which was played on Nova Roma.
Shang-Chi destroyed the Darkhawk on Eternity Range. This is a slightly suboptimal play, Enchantress would have been better but the outcome was the same in this situation.
She-Hulk added power to Kamar-Taj and I was able to win all three locations.
This game highlighted the power of the turn 6 combos in this deck, even against multiple Series 4 and 5 cards. It also highlighted the importance of managing turn priority heading into turn 6. If I had priority in this game then I would have lost. With turn 6 priority, Nova Roma would have been won by the second Darkhawk, Eternity Range would have been drawn and She-Hulk wouldn’t be enough to win a tiebreaker.
Location Guide
One weakness of this deck is that there is no room for location control and there is no reach into locations like Sanctum Sanctorum. Challenging locations can include:
- Central Park – limits playing space
- Crimson Cosmos – can’t play cards here once cost reduced
- Danger Room – only Armor can mitigate effects
- Death's Domain – only Armor can mitigate effects
- Elysium – turn 5 Wave will let them play two cards of any base cost
- Kamar-Taj – opponent usually gains more advantage from On Reveal effects
- Knowhere – can’t use Enchantress or Shang-Chi
- Kyln – can’t add power after turn 4 without Sunspot
- Sanctum Sanctorum – can’t add any power here and limits playing space
- Savage Land – limits playing space
- Bar With No Name – can only tie location at best
- Titan – turn 5 Wave will let them play two 6 cost cards
- Wakanda – opponent can avoid Shang-Chi destruction
While there are challenging locations for this deck, there are also several which it is able to take advantage of. These can include:
- Asgard – Zabu allows big turn 4 push
- Avengers Compound – Goose can stop opponent playing a big card on turn 5
- Baxter Building – Goose can limit opponent’s power potential
- Cloning Vats – multiple Sunspot is very strong
- Dark Dimension – can hide Enchantress/Shang-Chi/Drax
- Elysium – can extend turn 6 combos even further
- Gamma Lab – Shang-Chi destroys their Hulk(s)
- Klyntar – lose negative effect of Lizard
- Knowhere – Zabu can’t be negated
- Limbo – Sunspot soaks more energy, She-Hulk is free after skipping turn 6
- Mojoworld – Shang-Chi can swing number of cards here and avoiding early guarantees losing priority tie breakers
- Monster Island – Shang-Chi can destroy their Monster
- Monster Metropolis – Goose can limit opponent’s power potential, Shang-Chi can destroy
- Morag – can flood multiple locations easily on turn 6
- Muir Island – Shang-Chi can destroy
- Nidavellir – Shang-Chi can destroy
- Onslaught's Citadel – Zabu cost reduction doubled, Enchantress stops opponent using the location effect
- Sinister London – multiple Sunspot is very strong, Goose can limit opponent’s power potential
- The Big House – secondary Goose effect limits opponent
- The Nexus – Goose can limit opponent’s power potential
- Washington D.C. – Enchantress can boost own card’s power
- Worldship – deck can go tall and counter opponent
Matchups
Due to the nature of the deck, there are no decks which are completely unbeatable but they can hinge on drawing the right counter cards. In the same vein, drawing the correct counter cards can make a game extremely easy. The most important cards and interactions for selected matchups are summarized below.
- Seracle Surfer – Turn 5 Wave to limit their final turn push
- Shuri Zero Panther – Shang-Chi to beat one of their powerful locations
- Negative Surfer – Turn 5 Wave to limit their final turn push
- Good Cards – Leech into Leader very difficult to overcome, use aforementioned turn 6 tricks to beat Aero/Leader
- Baero – Early Armor, turn 5 Wave can help them so often better to skip turn 5 and let them Wave (makes your She-Hulk free)
- Galactus Electro – Moon Girl helps replenish resources before Doctor Octopus, dependent on final turn priority to Shang-Chi
- Electro Ramp – Leech into Leader very difficult to overcome, use aforementioned turn 6 tricks to beat Aero/Leader
- Patriot – Enchantress on turn 6 can win the game but have to manage priority well
- Seracle Control – Strange fight to avoid priority, turn 5 Wave limits their final turn push
- Thanos Zoo – Turn 4 Enchantress on Quinjet can limit them, turn 5 Wave very strong
- Zerocula – Enchantress to counter Kazar, turn 5 Wave can disrupt Dracula discard
- Lockjaw On Reveal – Goose can limit their ability to push on a non Lockjaw location, turn 5 Wave prevents Mjolnir/Wasp plays, Shang-Chi destroys big cards from Lockjaw
- Wong On Reveal – Enchantress or Goose on Wong location if possible, might want priority in this matchup
- Cerebro 2 – Difficult to avoid having priority, Enchantress on Blue Marvel is better than Cerebro/Mystique
- Ongoing Destroyer – Enchantress and Shang-Chi key, consider not playing your Armor to limit their safe locations
- Zabu Darkhawk – Enchantress and Shang-Chi key, Enchantress on Darkhawk is better than Shang-Chi to prevent Mystique copying the ability
- Devil Dinosaur – Enchantress and Shang-Chi key, use turn 6 Aero trick to ensure Enchantress/Shang-Chi hit Devil Dinosaur
Card Replacements
I would say that the majority of the deck is irreplaceable since the synergy between the cards is so tight. This unfortunately does include She-Hulk, which I was lucky to pull as my first Series 4 card from Collector Reserves, and I’m disappointed that many people won’t be able to try out the deck as a result.
The main flex spots in the deck are Rockslide, Drax, Lizard and at a push Goose could be cut. Of course, if you have cards like Darkhawk and Shuri then they could definitely make the deck even stronger. In fact, Darkhawk would be my ideal replacement in the deck for Drax.
If you want card replacements in the 4 cost slots which aren’t Series 3 or above then you could consider Jessica Jones for a strong turn 4 play. Rescue could play a similar role as a Series 3 card but both of those limit your options for turn 6. Another combo for the 4 cost slot to consider is Strong Guy and Hellcow which could provide an alternative power push when Moon Girl duplications aren’t possible.
If you don’t own Goose or don’t like Lizard they could also be experimented with. Scorpion and Iceman are always great low cost cards for disruption, Scarlet Witch could add location control or you could use Psylocke to curve into one of your 4 cost cards a turn earlier.
Snapping and Retreating
Snapping with this deck requires knowledge of your opponent’s deck and what cards you need to counter them. I would tend to avoid snapping before turn 5 because you need enough time to gather that information and ensure you draw the correct counter card. However, snapping on turn 6 will often scare opponents away because it will make them think you have the correct card to beat them.
That leaves turn 5 as the turn you are most likely to want to snap. By turn 5 you will have already planned out your turn 6 play and you should be able to determine how impactful a turn 5 Wave into turn 6 combo will be.
One extra tip when playing a turn 5 Wave against a deck that aims to swarm the board on turn 6 (e.g. Zerocula or Negative Surfer) is to wait out the majority of your turn timer before you snap. If you snap at the start of turn 5 they may change their play to account for cards like Leech and play as much of their hand as possible. Waiting the timer out before snapping and playing Wave means they won’t be able to adjust their play and will only have a short time to decide whether they should retreat or risk losing an extra cube.
Retreating is fairly straightforward with this deck. If you don’t draw the right counter card for the match up (check the matchup section for these) then you will probably need to retreat. If an opponent snaps early then I tend to stay until turn 6 to evaluate whether a counter card can steal the game from them. Most other decks snap if they have their combo plays but we don’t have to push more power than them, we just have to remove their power with Shang-Chi or Enchantress.
Games without Zabu are definitely winnable with a variation of cards like Moon Girl, She-Hulk and Wave but drawing neither Zabu or She-Hulk is likely going to be a retreat every time.
Conclusion
In conclusion, I believe this deck is a very strong way to utilize Zabu and has alternate win conditions unlike some other Zabu centric decks. It has a very similar playstyle to Sera control so if you like that deck then I’d definitely recommend trying out this one.
I also hope that my deck building process helps to provide some insight into how you can look to build your own decks or make adaptations to existing decks based on the key principles of winning cubes. It might also provide some encouragement to see that Zabu decks don’t need multiple Series 4 and 5 cards to reach Infinite. Series 1 and 2 already provide two of the game’s most impactful 4 cost cards – Enchantress and Shang-Chi.


More Content